El Niño: What to check on your downspouts
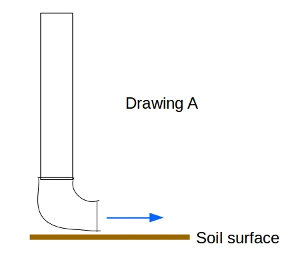 In usually-water-lean Southern California, most of us have directed rain gutter downspouts to run into our gardens, so that we can make the most of every drop. (drawing A) This is a great setup for most years, when we get a mere drizzle.
But this year with Godzilla El Niño floods coming, we need to make some changes.
Water will find a way out — downhill — regardless. And sometimes the way water escapes can be very destructive. Your job in preparation is to create an easy escape channel for the excess water, a channel which is not destructive. For instance, an outlet that directs excess water to the storm drain.
Downspout splash

If your rain gutter lets out onto the surface of your garden, do you have anything in place to prevent washouts? How are you preventing soil erosion?
A “gutter downspout splash” is the bare minimum. (Home Depot product, or you can make similar from discarded roof tiles).
However, pay attention to where your downspout splash is directing the water. What is at the end of your splash?
What is downhill from the end of the downspout? For instance, I fear that one downspout at the Community Garden at Holy Nativity will flood the bunny enclosure. Now is the time for installing a different design.
Infiltration pit
If your downspout is directed into an infiltration pit in your garden (drawing B), is that pit ready to receive a really large flow of water? Imagine water gushing out of your downspout at full force.
First of all, any infiltration pit should be located at least 10feet from any building foundation. You don’t want to be encouraging water to soak into your foundation.
If the infiltration pit is simply a hole in the soil, or a mulch pit, consider strengthening it now, in anticipation of the heavy rains. Consider lining the pit with loose rocks, broken tiles, broken pottery, or small unmortared pieces of urbanite/reclaimed concrete. Lay these along the inside edge, particularly on the face that is across from the downspout, to create a bowl. (drawing C).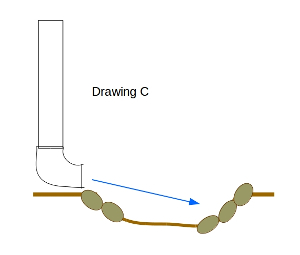
As you do so, make sure that you create a channel for overflow (drawing D), in anticipation of getting so much water that the soil couldn’t absorb it.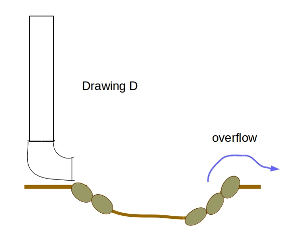
In designing your overflow channel, you should consider all the things I mention in this post (what is downhill? lining it with rocks, etc.).
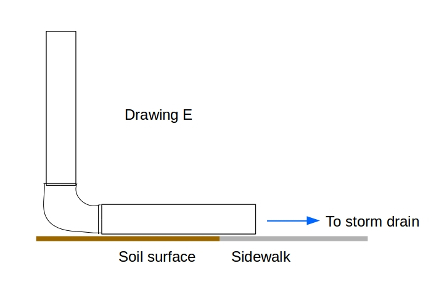
Another simple solution is to buy a fitting for the bottom end of your downspout, plus a long piece of downspout extension. (drawing E) The extension would direct water past your garden soil, into the storm drain.
 For the initial storms or for light storms, you could leave your downspout how it was — draining into your garden, soaking into your garde.
But for really heavy storms, or once your soil was saturated, or if you began to notice washouts happening, you would already have the tools — ready and on your property — to take care of the problem.
And when we return to dry winters, you could remove the fitting and return to old ways, which work fine during a drizzle.
- more of my posts about preparing for el Niño
