Origami Seed Envelopes
 Here’s how to make an instant seed envelope out of any square of paper.
If you’re a crazy seed-saving person like myself, this will come in handy. You can use any scrap of paper, grocery store receipt, newspaper, junk mail, whatever you have around at the moment. For purposes of this explanation, I’ll use a piece of printer paper with my Cityscape Seeds template printed on it.
(at the bottom of this post, you’ll find a link to download a free template)
Step #0: The first thing you need is a square. All four sides need to be the same length. This does not work with a rectangle. You will need to cut off (or tear off) the remaining strip, to turn the rectangle into a square.
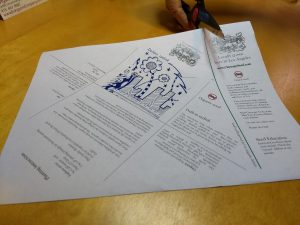
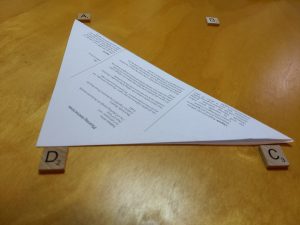
For ease of explanation here, we’ll give the four corners names: A, B, C, D.

Step #1: Once you have a square, make the first fold, corner B to corner D. (in my template file, I have provided a guideline for you.) You should end up with a Right Triangle (90degrees in corner D).
If you are using paper that has a design on it, the design should be visible on the exterior at this point.
Step #2: Now, that long fold you made in Step #1 (the hypotenuse of your Right triangle) – mentally divide it into thirds. The thirds don’t have to be exact. If you’re doing this in a hurry with scrap paper, you’ll find you can be quite casual about it and it will still work. In my template file, I have provided guidelines for you.
Along that long fold, we’re going to fold two flaps you can think of as “barn doors.”
Fold corner A along the 1/3 mark, folding the corner toward the 2/3 point to create the first barn door.
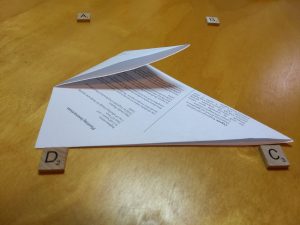
Step #3: Fold corner C along the 2/3 mark, folding the corner toward the 1/3 point to create the second barn door.

Step #4: Tuck corner A into the pocket created by corner C. Yes, separate the layers of paper at corner C and tuck corner A in there. Press your envelope flat to set the folds.

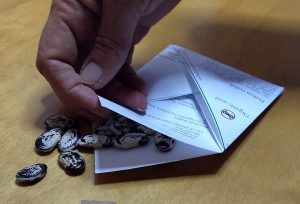
Step #5: Now you’re ready for the important part: SEEDS! Ease your seed envelope open at corner D by separating the layers of paper. Add your seeds.
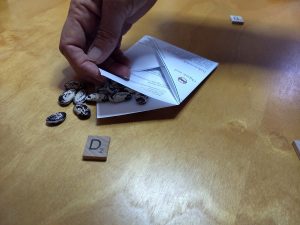
(Yes, I know those aren’t daikon radish seeds like it says on the envelope, but the Christmas limas looked better for the photo!)
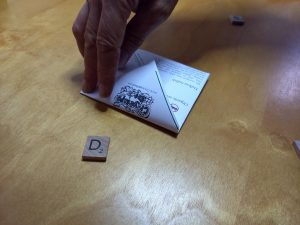
To close your envelope, simply fold corner D toward the center.
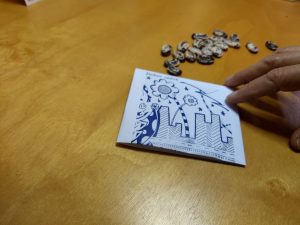
Here’s what the front looks like. (with a few more lima beans to confuse the issue)
Download a FREE template so that you can print lovely custom envelopes on your home printer.
- Here is a .pdf file of the seed envelope I gave away at the 2018 National Heirloom Festival, so you can see what it looks like on a flat sheet.
- I build my template in the free LibreOffice Impress. It could also be done in Powerpoint, or in any graphics program you’re familiar with.
- It comes out great when done in full color and printed on a color printer.
